

Last Updated on April 26, 2019 by Kristen

Photo by Daiga Ellaby on Unsplash
My daughter, who is 6 years old, loves going to the nail salon. I get it, I used to love it too. It felt like a treat, an hour or so of pampering that resulted in the satisfaction of looking down at feet and fingers with perfectly pretty, shiny nails.
But those New York Times articles in 2015 about slave labor, disease and birth defects associated with salons made the experience feel significantly less luxurious. No wonder the nail techs seem so unhappy and sometimes downright grumpy. On my most recent visit, I got a full-on, unabashed eye roll when I hesitated about the color she chose for my fingers to match my toes.
I realize there are nail salons with responsible labor practices that do their best to prevent dangerous chemicals from injuring workers. Sparkle, Lux SF are a few in San Francisco and I’m sure most cities have similarly ethical services.
But my nail salon days are over, I do believe. I’m a middle-aged mom living in the suburbs now, and I don’t have time to regularly drive into the city for an ethical mani-pedi, sadly. I’ll never say never, and I do hope a special occasion arises when I can take advantage of such pampering. But for now, the only pampering I have time for are my two hair salon visits a year, which each consume a full day of my life (hopefully one of these days I’ll be writing the “F That: coloring your hair” post; not quite there yet).
All this is to say that I’ve taken on the task myself—I mean how hard could it be, I figured? The truth is, despite the claims of the woman in the video below, I did not find it easy to do my own gel nails. This makes sense given regular polish is a challenge for me (hence my nail salon addiction). So be prepared for a little learning curve if you’re not experience at doing your own nails.
On my first try, the polish was much too thick and messy (despite her warnings), mainly because I couldn’t see what I was doing. My eyes had a hard time adjusting to the close-up work. I peeled it off after just a couple days—which, if you’ve had gel before, you know damages your nails. So that was a fail.
The second try (I’ve only done it on my own twice so far) things went more smoothly, mainly because I bought myself a magnifying lamp (see below for all the equipment I’m using). I managed to mostly keep the polish away from my cuticles and applied thin coats so they didn’t look malformed and clumpy.
Before I give you guys my step-by-step instructions, here are a few of the pitfalls I encountered (and that hopefully you can avoid).
1. Buy a magnified light
If you’re planning to do your own gel nails regularly and you’re over the age of 40, trust me, you need this. Yes, it will make you feel old, but your nails will look 100% better.
2. Banish fuzzies and hairs.
Especially if you have animals, thoroughly wipe down the table you’ll be working on, and use paper towels instead of cotton balls to prep your nails and to apply the finishing wipe at the end (a necessary step or else your nails will feel sticky).
3. Apply thin coats.
Thicker polish will lead to peeling and nails that look deformed or weird.
4. Avoid the cuticle.
When you’re painting your nails, push the brush close to the cuticle but don’t touch it (easier said than done, I know). If the polish sticks to your cuticle it can create a pocket of air where the polish will quickly peel.
5. Seal off the tips.
This step isn’t easy if you have short nails, but do your best (again without too much polish on the brush) to swipe the ends of your nails. This will seal the color nicely and help your manicure last longer.
6. Buy the cuticle oil.
There are probably other products you could use to condition your cuticles and the skin around your nails, and I wondered if I really needed this product. But I was thankful to have it because the alcohol-based products used to prep and finish nails is extremely drying.
I’m feeling pretty good about my setup, even with just two tries under my belt. And my second manicure has currently lasted a full week with no signs of peeling yet. So here’s what I’m using to get those pretty nails without the time suck, expense and guilt.
Supplies
Magnifying lamp
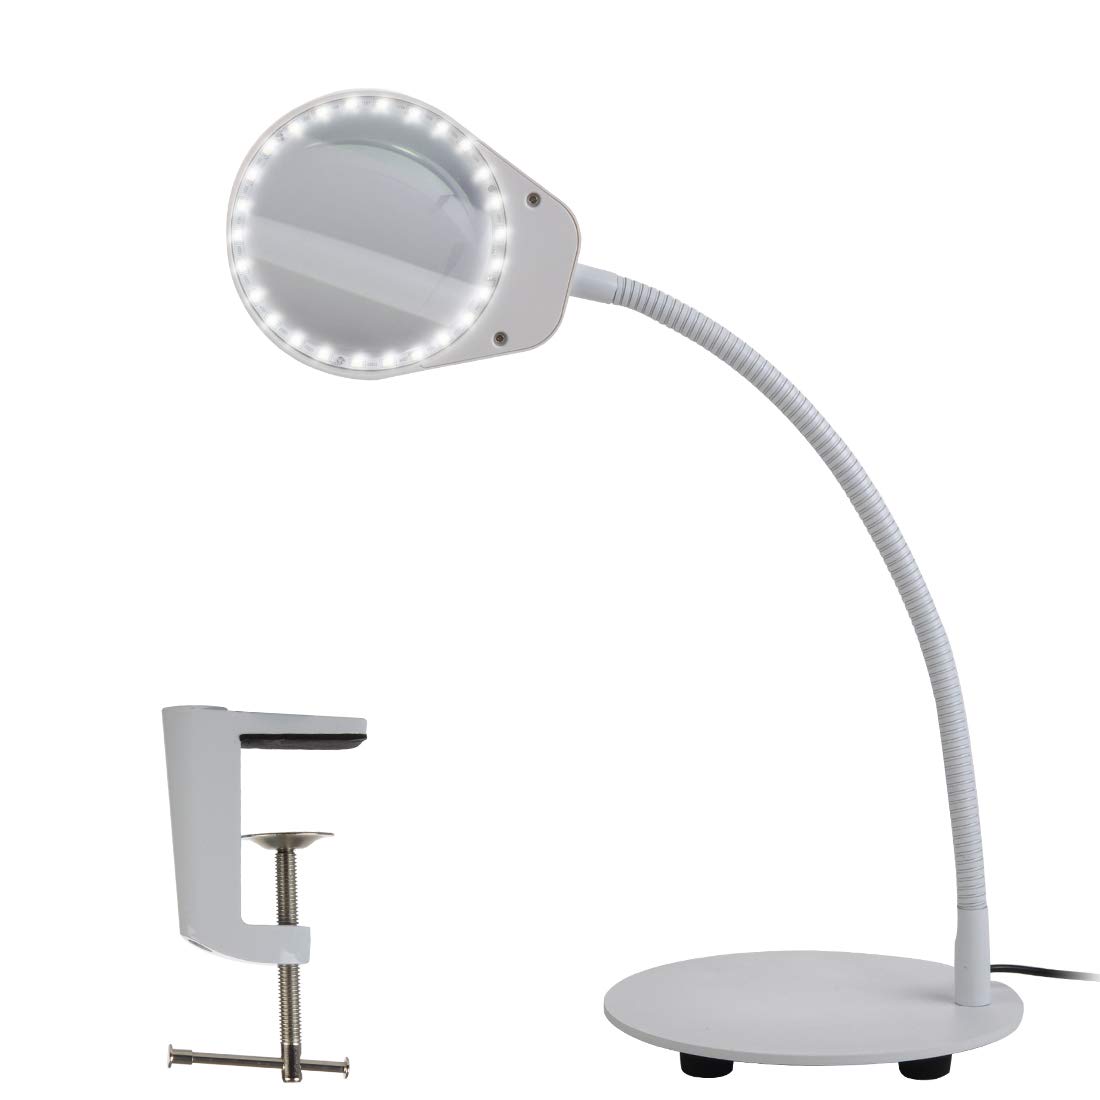
This magnifying lamp significantly improved my gel mani results. However, if you’re serious about doing your nails at home, you might consider spending more for a lamp with an articulating arm. The bending mechanism of the one I bought makes it difficult to get the magnifier super close to the table without the lamp falling over. It comes with a clamp to hold the base in place, which works O.K. but is kind of a P.I.A. It’s up to you whether it’s worth paying about twice as much for the convenience of an articulating arm.
Gel UV Nail Light 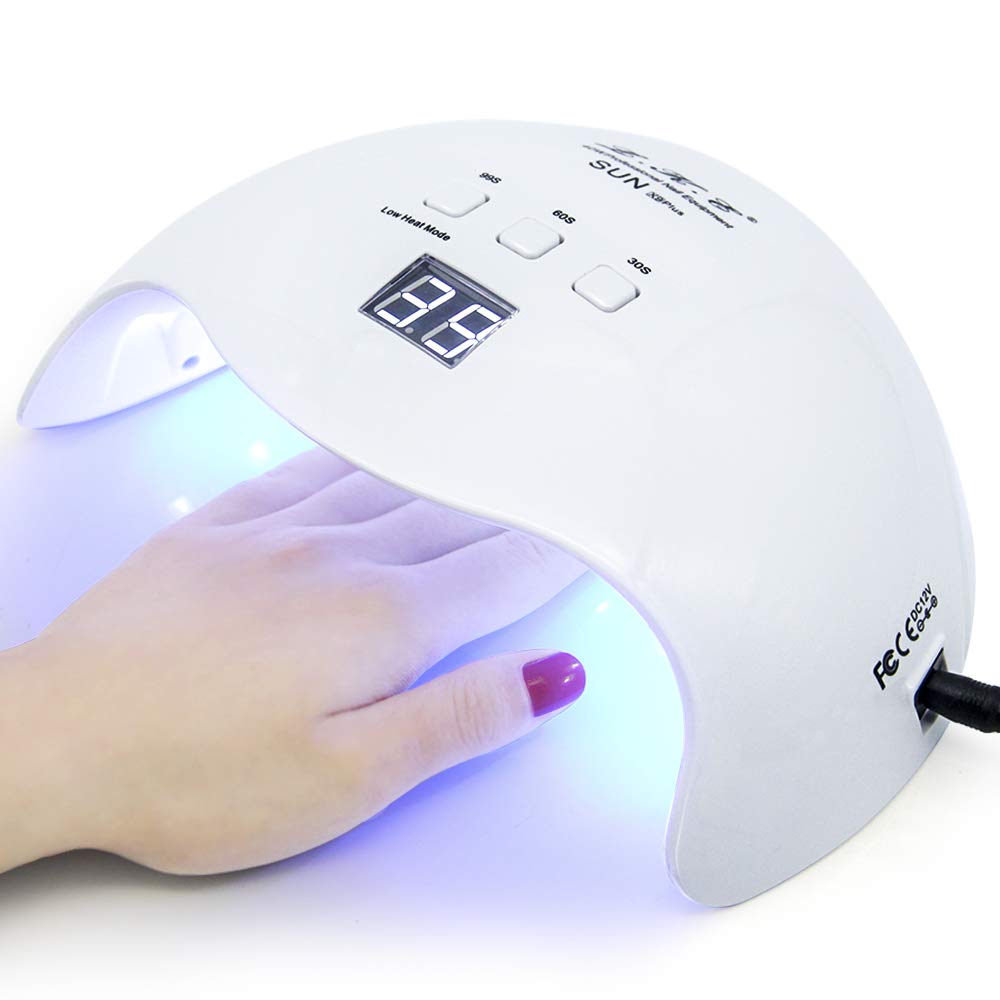
I chose this nail light because it was the cheapest one that fits your thumb. The one she uses in the video above requires that the thumb be cured separately, and I don’t have time for that. This one works great!
Gelish Full-Size Basix Kit
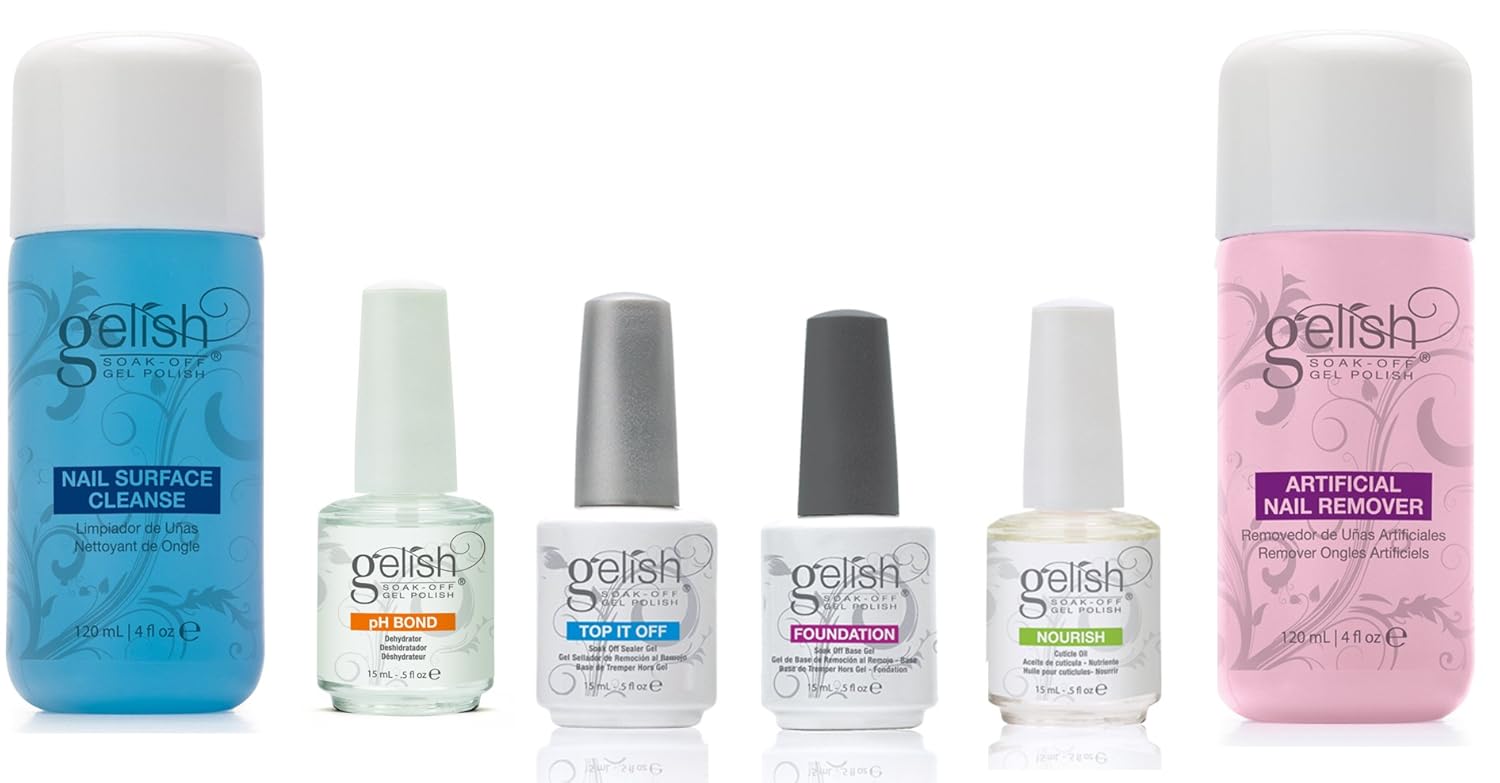
I ordered the Gelish Mini Basix kit, but it was sold out at press time. The full size one is a good option, especially if you think you’ll continue on this DIY gel nails journey. Either way, buying these supplies together makes sense because you really do need everything in it.
Gelish Mini Sassy Intergalactic 6 Pack
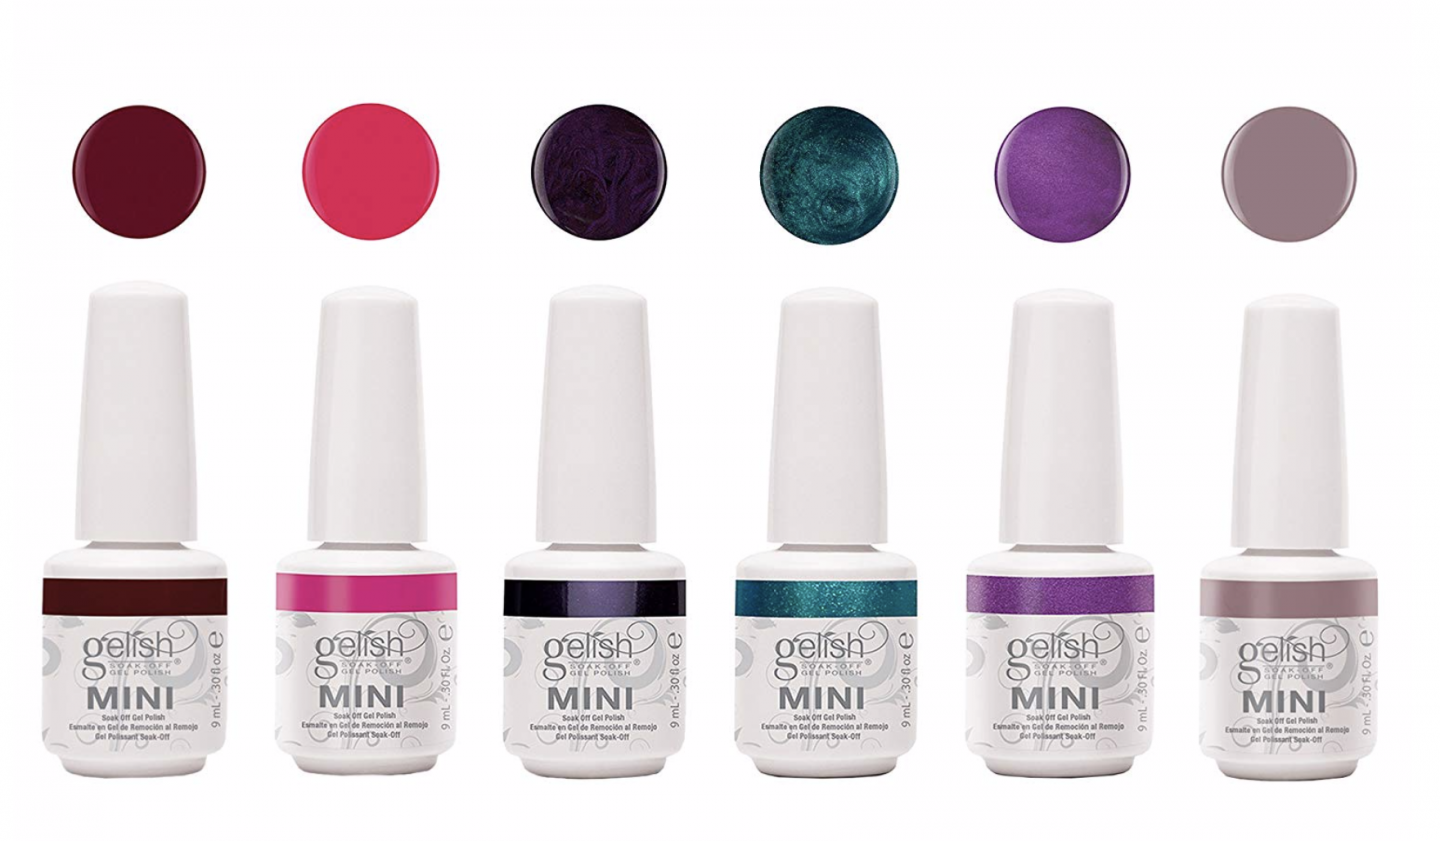
These seemed like a good collection of colors to start with, however, I thought the dark purple was black! Just an FYI.
Steps
-
File
File the nails, trim any hangnails, push back cuticles, and gently file nail surfaces. The starter kit above comes with a cuticle pusher, file, and special file tips you can attach to the cuticle pusher so you can rough up the surfaces of your nails. Some salons I’ve gone to take the extreme and unnecessary step of using a mechanized nail tool (which is usually used for acrylics) to grind down the nail surface. Do not let anyone do this to you! You only need to gently buff the surface of your nail to get rid of oils and create a surface the polish can to grab on to.
-
Dehydrate
Apparenlty moisture is the Achilles heel of gel nails. Use the pH Bond to get your nails extra dry.
-
Apply Base Coat
Apply a super thin layer, avoiding the cuticle. Don’t forget to paint the top edge to create a good seal. Cure for at least 30 seconds—I did 60 seconds just to be safe but the polish instructions say 30 is enough. You will want to test out appropriate times with your light and polish combination.
-
Apply Color
Again, paint a very thin layer. It will probably look streaky, especially if you’re using a light color. But it will become solid with two or three coats. Paint the top edge each time you apply a layer.
-
Apply Top Coat
Same as the other layers, this should be thin, avoid the cuticle, and don’t forget the top edge.
-
Wipe Nails
Your nails are cured at this point, but they will be tacky, and that will only be remedies by wiping them with the Nail Surface Cleanse (regular alcohol might also work). Use a paper towel rather than a cotton ball or pad to reduce the number of fuzzies.
-
Nourish
After all that, your cuticle and skin around your nails will be super dry. Use the Nourish product to rejuvenate them.
-
Pop some Bubbly
Time to celebrate the fact that you didn’t contribute to indentured servitude, subjected only yourself to potentially toxic fumes (hopefully you cracked a window), saved money (or you will in the long run), avoided potential infections that happen when tools are not cleaned properly, and didn’t get one bit of shade from an unhappy nail tech.
